 by michael daigle · 9 Jan 2024
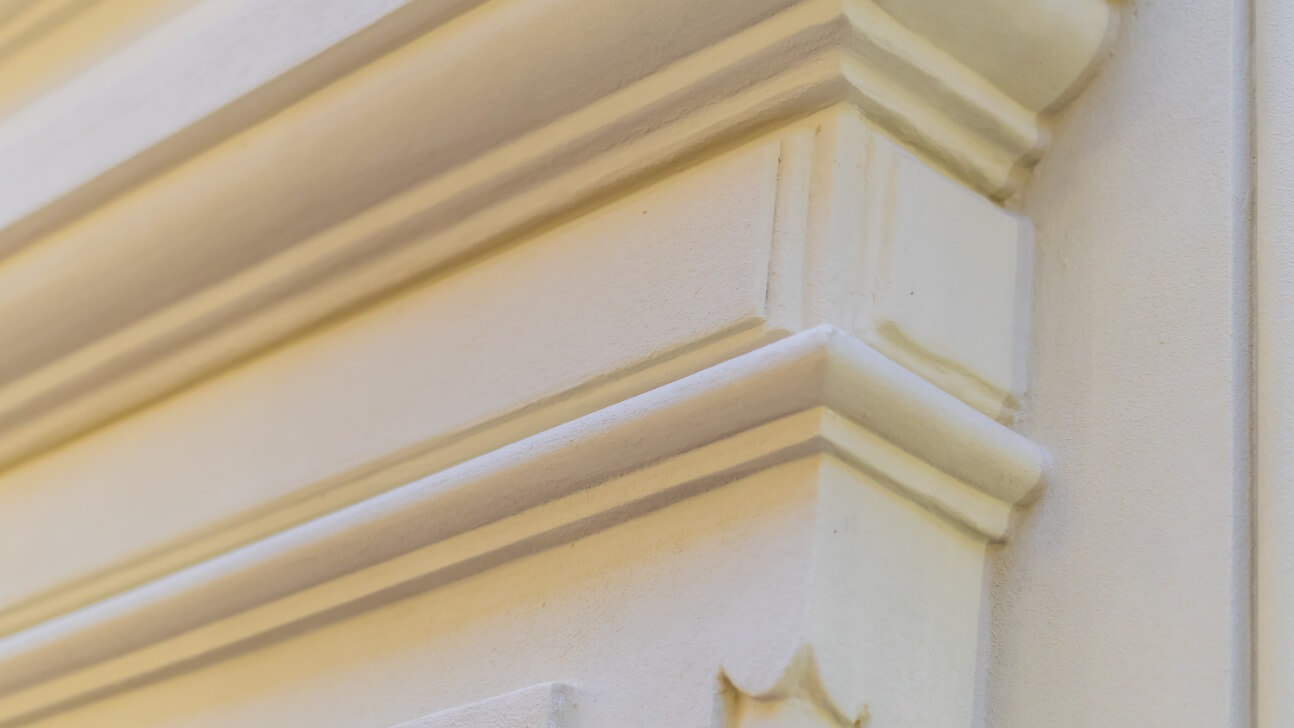
Table of Contents
Have you ever stepped into an old Victorian home or historic landmark and been enchanted by the intricate details of the painted woodwork? The curved spindles of a staircase, the panels of a wainscot, the molding framing each doorway - these decorative touches are hallmarks of craftsmanship from bygone eras. Yet over time, painted surfaces succumb to scratches, water damage, and fading. Restoring painted woodwork requires a delicate touch to revive the charm while preserving the patina of age. With some basic techniques and the right materials, you can bring back the beauty without losing the character. Follow along as we explore ways to refresh painted woodwork and keep the stories of the past alive.
Assessing the Condition of Your Painted Woodwork
Assessing the condition of your painted woodwork is the first step. Check for any cracks, chips, or peeling paint. Run your hands over the surface to feel for rough areas. Shine a bright light at an angle to spot flaws. Look for signs of water damage or rot as well.
- Cracks: Lightly sand and fill small cracks with wood filler or caulk that matches your wood tone. For wider cracks, you may need to apply a wood patch.
- Chips and peels: Lightly sand rough edges. Apply a primer to any bare wood spots before touching up with matching paint. For large damaged areas, you may need to sand down to bare wood and repaint.
- Water damage/rot: Severe damage requires removing damaged wood and patching before repainting. You may need to replace sections in extreme cases.
- Dull, faded finish: A fresh coat of paint in the original color or a complementary new shade can revive the look. Lightly sand, then apply two coats of paint, waiting for each to dry as directed.
As you inspect, consider if a total paint removal and repaint may be needed for the best results. While keeping original charm is ideal, sometimes a fresh start is required. Think about the time and costs involved for your desired outcome. With some TLC, you can bring your painted woodwork back to life while maintaining its vintage appeal. Preserving history never looked so good!
Cleaning Painted Wood Surfaces Properly
Cleaning painted woodwork properly is key to preserving its charm and character. Start by giving the wood a light dusting to remove any loose dirt or debris. Then, tackle any stuck-on grime.
For heavy grease and grime, make a paste from baking soda and water and gently scrub with the paste using fine-grade steel wool (grade #0000) or a soft cloth. Rinse well with water and let dry completely.
For caked on debris, use a plastic scraper or putty knife to loosen the bigger chunks, then scrub off remaining residue with the baking soda paste and steel wool. Be very gentle to avoid damaging the paint.
Washing and rinsing
Once dirt and debris have been removed, washing the woodwork with a mild detergent and water is a good next step. Mix a few drops of dish soap in a bucket of warm water. Use a sponge or soft cloth to wipe down the woodwork with the soapy water.
Rinse the woodwork thoroughly with clean water to remove all detergent residue. Pat dry with towels or let air dry completely.
Protecting the wood
After cleaning and drying the wood, apply a protective sealant like paste wax, tung or linseed oil. Wipe on with a soft cloth, let it soak in as directed, then buff off any excess with a clean, soft cloth. Reapply as needed.
With proper cleaning and sealing, your charming painted woodwork will stay looking fresh for years to come. Take your time and be gentle to get the best results while maintaining its historic appeal.
Dealing With Flaking or Peeling Paint
Dealing with flaking or peeling paint on woodwork is inevitable for any homeowner. As paint ages, it loses adhesion to the surface below, causing it to crack, chip, and peel. There are a few techniques you can try to remedy the situation while maintaining the charm and character of your woodwork.
Lightly sand rough edges
Use fine-grit sandpaper (around 220 grit) to lightly sand any loose or rough paint edges. Wipe away dust with a tack cloth. This will provide a smooth surface for the new paint to adhere to. Be very careful not to sand through the existing paint layer.
Apply a bonding primer
For areas where bare wood is showing through, apply a bonding primer. These primers are designed specifically for painting over slick or glossy surfaces where regular primers won’t adhere well. They provide maximum adhesion for your new topcoat.
Use a durable paint
Choose a paint specifically meant for trim and woodwork. These paints contain more resin than regular wall paint, making them harder and more durable. An enamel, alkyd, or acrylic paint works well for high-traffic, high-use areas prone to scratches or dings.
Consider a clear topcoat
For the ultimate in protection, apply two coats of a clear acrylic or polyurethane topcoat over your newly painted woodwork. This seals and protects the surface while still allowing the charm and character of the wood and paint to show through. Reapply the topcoat every few years to maintain protection.
Touch up as needed
Even with the best preparation and products, some peeling or damage may still occur over time. Keep some of your paint on hand for easy touch-ups. Carefully scrape off any loose paint, lightly sand, then touch up with a small artist's brush. feathering out the edges to blend in with the surrounding area.
With some light prep work, the right products, and ongoing maintenance, you can revive and protect peeling paint on woodwork while retaining its vintage appeal. Your home's charm and character will shine through for years to come.
Fixing Small Holes and Imperfections
Fixing small imperfections in painted woodwork will help preserve its charm and character. There are several techniques you can use to patch little holes, cracks and dents without refinishing the entire surface.
Wood filler
For small holes, cracks and imperfections in painted wood, wood filler is very effective. Look for a filler close in color to your woodwork. Apply it with a putty knife or filler applicator, then let it dry as directed. Lightly sand the area, wipe away dust, and paint to match. Wood filler shrinks a bit as it dries, so you may need to apply a second coat.
- Wood filler can also be tinted to match your paint color. Mix in a little paint from your can and test it on an inconspicuous area first to check the match.
Patch kits
Pre-made wood patch kits contain putty or paste in a variety of wood tones to match common trim and molding. Select a shade that closely matches your woodwork. Kits typically come with a putty knife or applicator. Follow directions to fill imperfections, then sand, paint and seal as needed. For large holes or damage, wood patches provide an easy solution.
- Look for patch kits especially formulated for painted surfaces. They provide good adhesion and take paint well.
Concealing dents
For small dents or dimples in woodwork, you can often raise the grain using a damp cloth and heat. Place the damp cloth over the dent and apply an iron on the cotton setting. The heat and moisture will cause the wood fibers to swell, raising the dent. You may need to repeat a few times. Once raised, let the area dry completely, then sand lightly and paint to match.
- Be very careful using this method, as too much heat can scorch the wood. Keep the iron moving and check progress frequently.
By taking your time and using the proper techniques for the type and size of imperfection, you can touch up painted woodwork without a full refinishing job. Your woodwork will maintain its character and you'll preserve the charm of the home.
Choosing the Right Paint for Restoration
When restoring painted woodwork, choosing the right type of paint is key to preserving its charm and character. There are a few options to consider:
Oil-based paint
Oil-based paint is a traditional choice for trim and woodwork. It provides durable coverage and a smooth, glossy finish. However, it has strong fumes, takes longer to dry, and requires the use of solvents for cleanup. For restoration, oil-based paint can work well for areas that see a lot of wear and tear.
Latex or acrylic paint
Latex or acrylic paint is water-based, so it has barely any odor and cleans up easily with just soap and water. It dries quickly and provides good coverage. For restoration, latex paint may not adhere as well to existing oil-based paint, so you’ll want to lightly sand the surface first. Latex is a good option if you want an updated, environmentally-friendly paint that still has a enamel-like sheen.
Chalk paint
Chalk paint is a popular choice for giving woodwork a rustic, distressed look. It goes on smoothly but requires a wax or sealant topcoat. Chalk paint is easy to distress by sanding edges or scrubbing the surface. For restoration, chalk paint can be a simple way to refresh woodwork and give it a vintage feel, but may not provide the most durable finish.
Stain
Stain allows the natural wood grain to show through, enhancing its beauty. Stain comes in a variety of opacities, from semi-transparent to solid. For restoration, stain is ideal if you want to revive woodwork while still keeping its original, natural look. Stain does require a protective topcoat like polyurethane for durability.
In the end, consider the look you want to achieve and how much you need to restore the woodwork’s surface. The right paint or stain choice, properly prepared and applied, will help keep your home’s charming character alive for years to come.
Important Prep Work Before Repainting
Prepping the Woodwork
Before repainting your woodwork, it’s important to thoroughly clean and lightly sand the existing paint. This will provide “tooth” for the new paint to adhere to, ensuring a smooth finish.
Wash the woodwork with a degreaser or heavy-duty cleaner to remove built-up grime and grease. Use a scrub brush to loosen caked on messes. Rinse well with water and let dry completely.
Lightly sand the woodwork with fine-grit sandpaper (around 220 grit) to rough up the surface. Wipe away dust with a tack cloth.
Caulking Cracks and Gaps
Check for any cracks, gaps or holes in the woodwork and caulk them. This prevents air leaks and provides an even surface for painting. For larger gaps, you may need to apply a wood filler, sanding it flush once dry.
Run a bead of paintable caulk along the edges where woodwork meets walls, ceilings, windows and doors. Also caulk where pieces of woodwork join together. Tool the caulk with a damp finger or caulk tool to smooth it out. Let it dry as directed before painting.
Patching Imperfections
Examine the woodwork closely for dents, dings, holes or water damage that needs patching. You want the surface as smooth as possible before painting.
Apply a wood filler or drywall compound over imperfections using a putty knife or drywall knife. Let it dry, then sand flush with the surrounding area. For water-damaged areas, you may need to scrape out loose material, then build up multiple thin layers of filler.
Lightly sand the entire woodwork one more time to provide “tooth” for the new paint. Your woodwork is now prepped and ready for a fresh coat of paint! With the right prep, you’ll keep the charm and character of your woodwork alive for years to come.
Brush Up on Proper Brushing Techniques
Proper brushing technique is key to achieving a smooth finish and preserving the charm of painted woodwork. Choose high-quality brushes designed for the type of paint you’re using. For latex or acrylic paints, use synthetic bristle brushes. For oil-based paints, natural bristle brushes work best.
Make sure you “break in” new brushes before starting your project. Dip the brush in paint or solvent and work it into the bristles. Then use a rag to wipe off any loose bristles. This will prevent stray bristles from ending up in your finish.
Load your brush with a moderate amount of paint. Don’t overload the brush, or it will be difficult to control and can lead to drips and splatters. Dip just the tip of the bristles into the paint. Tap the sides of the brush against the rim of the paint can to remove any excess before brushing.
Use smooth, steady strokes following the grain of the wood. Apply light, even pressure and avoid scrubbing. Reload your brush with paint as needed. For corners and crevices, use the tip of the brush.
Maintain a “wet edge” as you paint. This means brushing into areas that you have just painted before they have had a chance to dry. If you let the paint start to dry before brushing into it, you'll likely see lap marks and an uneven finish.
For the final coat, “tip off” the paint with light brushstrokes using just the tip of the brush. This helps ensure an even coat and a smooth finish.
With some practice, you'll be brushing on paint like a pro in no time. Taking your time and using proper technique will result in a high-quality finish that enhances the charm and character of your woodwork.
Tricky Areas to Tackle When Repainting
When restoring painted woodwork, some areas often prove trickier to tackle than a simple coat of paint on flat, open surfaces. These tricky spots require extra attention to detail to get right.
Trim and molding
The decorative trim and molding in old homes adds so much charm, so take your time when repainting these details. Use a small angled brush to carefully paint edges and corners, wiping away any drips or smudges as you go. For carved or ornate woodwork, you may need to do some light sanding to rough up the surface so the new paint has something to grip onto. Apply at least two coats of paint to trim and molding for the best coverage.
Windows and doors
Windows and doors also present challenges with their recessed panels, sills, tracks and hardware. Remove hardware like doorknobs to paint doors, taping off any glass panes. For windows, tape off the glass before painting the sashes and sills. Use a small brush to paint the edges and a roller for large flat areas. Don’t forget to paint the underside of the sill and the window well for a fully finished look.
Built-in cabinets
Built-in cabinets are tricky because you have to work around hinges, knobs and an uneven surface with trim and panels. Remove all hardware, then clean and lightly sand the cabinets. Paint the inside edges of the cabinets first before moving on to the exterior. Use angled brushes to paint trim details, then roll the large flat sections. Reinstall the hardware once the paint is dry for a crisp finish.
Staircases
Staircases provide their own set of challenges with spindles, railings, risers and treads. Remove any loose carpeting or hardware before painting. Start at the top and work your way down using angled brushes for the spindles and edges. Apply at least two coats of paint for the best coverage, waiting for each coat to dry completely. Non-slip treads or a clear sealant on treads provide extra traction.
With patience and the proper techniques, you can tackle even the trickiest areas when restoring painted woodwork and keep all the charming details intact. Take your time and don't cut corners for results you'll be proud to showcase.
Preserving the Charm: Decorative Painting Techniques
Preserving the decorative painting on woodwork helps maintain the charm and character of a historic home. There are several techniques you can use to protect painted finishes while keeping their aged patina.
Cleaning
Gently clean painted woodwork before repainting or sealing. Use a soft, damp cloth to wipe away loose dirt and grime. For stuck-on residue, make a paste from baking soda and water and apply with a soft bristled brush. Rinse well with water and let dry completely. Avoid harsh chemicals, abrasive cleaners and too much moisture which can damage the paint.
Minimal Touch Up
For small cracks, holes or scratches in the paint, use a touch up product that closely matches the color and sheen. Apply thinly with a small angled brush, blotting away excess. Multiple thin coats are better than one thick coat. Feather the edges to blend in with surrounding areas.
Consolidate Flaking Paint
If paint is flaking or peeling, a paint consolidator product can re-adhere loose paint to the substrate. Apply with a small brush, gently pressing any loose pieces back in place. Let it penetrate for the recommended time, then wipe away excess with a soft, damp cloth. This helps stabilize the paint without significantly changing the appearance.
Protective Topcoats
For the best protection, apply a topcoat like a clear acrylic sealer. Look for a product specifically for use on painted surfaces that allows some breathability. Apply 2-3 thin coats, waiting for it to dry between applications. This helps protect the paint from dirt and moisture damage while maintaining visibility of the original decorative painting.
By taking a gentle, sensitive approach to restoring painted woodwork, you can preserve its historic charm and character for many years to come. Protecting these heritage features helps ensure they remain an integral part of your home's story for generations.
Final Thoughts
So there you have it, some tips and tricks for restoring your home's painted woodwork while maintaining its character and charm. By taking your time, starting with a small section, and being gentle and patient, you'll be enjoying your refreshed woodwork in no time. Remember, imperfections are what give old homes their appeal, so embrace any marks or dents—they're telling a story. With the right approach and techniques, you can have woodwork that's clean and protected but still looks like it's been there for generations. Now grab your supplies, turn on some tunes, and dive in. Your woodwork and your home's unique style will thank you for it.